|
|
 10-03-2015, 09:15 PM
|
#1
|
|
Senior Member
Join Date: Oct 2014
Posts: 109
|
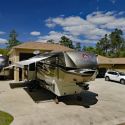
Titan Disc Brake Install
After reading the threads on here regarding upgrading to disc brakes, I decided to bite the bullet and called Titan Ron, aka Ron Russell. I ordered his install kit along with the Titan controller and Kodiac disc brakes. In a few days, Old Dominion Freight dropped a pallet off in the driveway!
__________________
2015 Carriage RL40, Residential Fridge, Onan 5.5KW
2020 Ram 3500 CTD, DRW, Aisin
|

|

|
|
10-03-2015, 09:24 PM
|
#2
|
|
Senior Member
Join Date: Oct 2014
Posts: 109
|
My son-in-law and I were able to get most of it installed today. I'm waiting on an L - bracket to mount the Brakerite on. We pulled the wheels off and started removing the drums and old brakes.
__________________
2015 Carriage RL40, Residential Fridge, Onan 5.5KW
2020 Ram 3500 CTD, DRW, Aisin
|
|
|
|
|
10-03-2015, 09:30 PM
|
#3
|
|
Senior Member
Join Date: Oct 2014
Posts: 109
|
Two of the brake drums had grease inside from leaking seals, (less than 10,000 miles). One brake shoe was worn down to the metal and had worn grooves in the drums. Next the backing were removed and the new caliper brackets installed. Titan Ron sent longer bolts for the caliper brackets.
__________________
2015 Carriage RL40, Residential Fridge, Onan 5.5KW
2020 Ram 3500 CTD, DRW, Aisin
|
|
|
|
|
10-03-2015, 09:31 PM
|
#4
|
|
Senior Member
Join Date: Jul 2015
Posts: 2,288
|
Looking good!!! Keep us up yo date with the install , you will love the difference
__________________
2020 F-350
2020 3991RD with-
17.5 Goodyear 114's , Titan Disc brakes, MorRyde 8K IS, Onan 6.5..
|
|
|
|
|
10-03-2015, 09:36 PM
|
#5
|
|
Senior Member
Join Date: Oct 2014
Posts: 109
|
One thing I did purchase that helped a lot, was an Ingersoll-Rand 20v battery powered 1/2" impact wrench. Very heavy duty, worked great. Next, the bearings were packed and inserted into the new rotors. I used the bearings that came with the rotors. I used the old method of packing bearings, putting a a gob of grease in the palm of my hand and pushing it into the bottom of the bearing. The large inner bearings hold a lot of grease! Then tapped in the inner seal.
__________________
2015 Carriage RL40, Residential Fridge, Onan 5.5KW
2020 Ram 3500 CTD, DRW, Aisin
|
|
|
|
|
10-03-2015, 09:44 PM
|
#6
|
|
Senior Member
Join Date: Oct 2014
Posts: 109
|
After the rotors were installed, the calipers were placed on their bracket. Titan Ron suggested that all of the calipers should be mounted in approximately the same position.
__________________
2015 Carriage RL40, Residential Fridge, Onan 5.5KW
2020 Ram 3500 CTD, DRW, Aisin
|
|
|
|
|
10-03-2015, 10:22 PM
|
#7
|
|
Senior Member
Join Date: Oct 2014
Posts: 109
|
The brake lines were uncoiled and connected. Four rubber flexlines were connected to the calipers. Then the hard lines were connected to the brass tees. Because of the location selected for the Brakerite unit, the lines were run down the left side of the 5th wheel. The Brakerite will be installed, as Titan Ron suggested on the left frame rail, tucked in behind the left front lift cylinder. This is directly under the left propane cylinder.
__________________
2015 Carriage RL40, Residential Fridge, Onan 5.5KW
2020 Ram 3500 CTD, DRW, Aisin
|
|
|
|
|
10-03-2015, 10:38 PM
|
#8
|
|
Senior Member
Join Date: Oct 2014
Posts: 109
|
In the kit from Titan Ron are clips and self tapping screws for mounting the brake lines to the bottom of the 5th wheel. All of the lines were installed and the fittings tightened. That's as far as we could go today. Once we get the L-bracket, the Brakerite can be installed. The wiring loom was pulled up from the battery compartment to the junction box for the pigtail.
__________________
2015 Carriage RL40, Residential Fridge, Onan 5.5KW
2020 Ram 3500 CTD, DRW, Aisin
|
|
|
|
|
10-03-2015, 10:45 PM
|
#9
|
|
Senior Member
Join Date: Oct 2014
Posts: 109
|
The color coded wires sent from Titan Ron will be connected inside the junction box, the white wire to white/ground. The black wire to the red-hot wire. The light blue to blue brake line. I disconnected the blue wire going to the old trailer brakes, so it wouldn't be energized every time I applied the brakes. The brown wire to the emergency brake switch wire (which is also connected to the blue brake wire). The purple wire I will connect to a red 12v+ connection in the battery compartment. That way, even if the trailer disconnects, you will still have power to the Brakerite. Well, that's all we could get done today, I hope this helps someone thinking about upgrading their brakes, it's a very doable project.
Next, mounting the Brakerite, connect the wiring and brake lines, then bleeding the system. Stay Tuned, if your interested!
__________________
2015 Carriage RL40, Residential Fridge, Onan 5.5KW
2020 Ram 3500 CTD, DRW, Aisin
|
|
|
|
|
10-04-2015, 12:09 AM
|
#10
|
|
Senior Member
Join Date: Jul 2015
Posts: 2,288
|
Very nice work , and even better write up!!
__________________
2020 F-350
2020 3991RD with-
17.5 Goodyear 114's , Titan Disc brakes, MorRyde 8K IS, Onan 6.5..
|
|
|
|
|
10-04-2015, 12:28 AM
|
#11
|
|
Senior Member
Join Date: Oct 2014
Posts: 109
|
Thanks, Ford truck guy, I'm guessing your pretty happy with your disc brakes. I was surprised when I took the drums off, just how bad the factory brakes were. I knew coming home this year from a trip out west, about 6500 miles, that the trailer was starting to push the truck, rather than stopping. I can see why now! I'm really glad I'm doing this upgrade.
__________________
2015 Carriage RL40, Residential Fridge, Onan 5.5KW
2020 Ram 3500 CTD, DRW, Aisin
|
|
|
|
|
10-04-2015, 02:01 AM
|
#12
|
|
Senior Member
Join Date: Feb 2013
Posts: 7,101
|
Man - I like those wheels!
Anyway - yes you will love the disks.
__________________
Brad & Dory - Lone Tree, CO
CURRENT - 2013 Itasca Meridian 42E/2013 Wrangler 4dr Sahara
SOLD - 2014 Redwood 36RL/2014 F350 DRW
|
|
|
|
|
10-04-2015, 02:38 AM
|
#13
|
|
Senior Member
Join Date: Oct 2014
Posts: 109
|
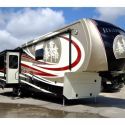
I had Crossroads upgrade from the original Chinese 16" G-rated tires to Goodyear G114 H-rated 17.5" tires. Those are the wheels they came on.
__________________
2015 Carriage RL40, Residential Fridge, Onan 5.5KW
2020 Ram 3500 CTD, DRW, Aisin
|
|
|
|
|
10-04-2015, 05:11 PM
|
#14
|
|
Senior Member
Join Date: Feb 2013
Posts: 7,101
|
That was a good move!
__________________
Brad & Dory - Lone Tree, CO
CURRENT - 2013 Itasca Meridian 42E/2013 Wrangler 4dr Sahara
SOLD - 2014 Redwood 36RL/2014 F350 DRW
|
|
|
|
|
10-07-2015, 06:09 AM
|
#15
|
|
Senior Member
Join Date: May 2015
Posts: 209
|
THANK YOU! I am preparing to attack this same project as soon as I get mine back home form the service center. Looking forward to it especially with your clear help with pictures. I read pic's much better than written instructions..... LOL!!!
|
|
|
|
|
10-07-2015, 01:09 PM
|
#16
|
|
Senior Member
Join Date: Oct 2014
Posts: 109
|
Yeah, I have the angle bracket needed to mount the Brakerite unit. I'll be able to finish it and post the of the project.
Fred
__________________
2015 Carriage RL40, Residential Fridge, Onan 5.5KW
2020 Ram 3500 CTD, DRW, Aisin
|
|
|
|
|
10-07-2015, 09:07 PM
|
#17
|
|
Senior Member
Join Date: Oct 2014
Posts: 109
|
I received the angle bracket from Titan Guy, as well as 90 elbow for the Brakerite. After talking to Ron on the phone this morning I proceeded to mount the Brakerite unit. Ron had suggested that I mount the unit on the frame rail, below the left LP tank, behind the left front landing gear. Many commercial installers mount the unit inside the storage bay. This requires drilling a hole through the bottom of the 5th wheel, creating another access for critters and the weather. I used four stand offs behind the bracket, so the two back holes on the bottom would clear the frame. Then I used four self-tapping screws to mount the bracket to the frame.
__________________
2015 Carriage RL40, Residential Fridge, Onan 5.5KW
2020 Ram 3500 CTD, DRW, Aisin
|
|
|
|
|
10-07-2015, 09:12 PM
|
#18
|
|
Senior Member
Join Date: Oct 2014
Posts: 109
|
The Brakerite is then mounted to the bracket, there are four phillips head screws that thread into the bottom of the Brakerite.
__________________
2015 Carriage RL40, Residential Fridge, Onan 5.5KW
2020 Ram 3500 CTD, DRW, Aisin
|
|
|
|
|
10-07-2015, 09:21 PM
|
#19
|
|
Senior Member
Join Date: Oct 2014
Posts: 109
|
Finally the brake line is connected to the 90 elbow and the reservoir filled. (You can use either fill hole). I then connected the color coded wires, using the butt connectors supplied by Titan Guy. They are the heat shrink wrap type. Then they are stuffed inside the supplied wire conduit.
__________________
2015 Carriage RL40, Residential Fridge, Onan 5.5KW
2020 Ram 3500 CTD, DRW, Aisin
|
|
|
|
|
10-07-2015, 10:21 PM
|
#20
|
|
Senior Member
Join Date: Oct 2014
Posts: 109
|
I wrapped the exposed wiring near the gooseneck with the wire conduit supplied by Titan Guy. I also connected the hot side of the purple wire to a constant hot side of the house batteries. This makes sure, if the trailer disconnects from the truck, the emergency cable is pulled and the brakes are fully engaged. After making all connections, I tested my new system by pulling the emergency brake cable. The pump started, which you can hear and then as it pumped fluid, I could hear the sound change as the reservoir emptied. I filled the reservoir back up. To finish this project, I need to bleed the brakes, all four, starting with the right rear (farthest from the pump) and finishing with the left front (closest to the pump). Then I will connect the truck, select heavy electric over hydraulic in the brake set up and take it for a test run!
__________________
2015 Carriage RL40, Residential Fridge, Onan 5.5KW
2020 Ram 3500 CTD, DRW, Aisin
|
|
|
|
|
|
| Thread Tools |
Search this Thread |
|
|
|
| Display Modes |
 Linear Mode Linear Mode
|
 Posting Rules
|
You may not post new threads
You may not post replies
You may not post attachments
You may not edit your posts
HTML code is Off
|
|
|
|
 » Recent Threads
 |
|
|
|
|
|
|
|
|
|
|
|
|
|
|
|
|
|
|
|
|
|
|
|
|
|