|
 11-08-2018, 03:34 AM
|
#1
|
|
Member
Join Date: May 2018
Posts: 50
|
 Exterior trim shifting and coming loose
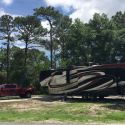
Some of the decorative trim pieces that cover the horizontal seams between where the fiberglass (or whatever that material is called) on the sidewalls and the aluminum skirting abut one another is shifting, or bowing and coming loose on our 2013 36FB. As you can see in the attached photos, it began about a year or so ago with two short pieces of the trim directly across from one another on both the door-side and off door-side of the RV. Contacted Crossroads/Redwood's warranty office at the plant, and based upon my photos, they called it, "Trim shift". My concerns that could it possibly be being caused by a structural issue in the 5er were pretty much laid to rest by my contact. Rather, it was indicated to be nothing more than simply a cosmetic issue. Then about six months later, the long piece of trim on the living room/dining slide-out began lifting away from the wall, thus creating gaps in the sealer used to keep water from running in behind the trim and into the seam. I quickly resealed it with a tube of clear Parr sealer (we have full body paint). Now just this week, the piece of trim that runs from the rear of the RV to the slide -out on our door-side is beginning to bow away from the wall in the center, thus leaving an open gap in the sealer.
Allow me to note that our Redwood 36FB has traveled less than four thousand miles in its entire life, been pulled by an HDT with an ET hitch, along with the TrailAire pin box, and it has spent 80% of its life under an RV carport cover where it currently is sitting. Since we are more your stationary RVers, having only moved it between the three campgrounds where we resided at, (and currently reside) one the auto level has completed leveling up the 5er after having moved it, I've always placed four screw jack-stands equally spaced under the frame from front to back on both I-beams to make the RV more stable. I only bring them up to snug so as not to put a twist or bow in the frame. I will share this, in the orientation that our host site is, (we manage a state owned campground) our door-side of the RV takes most of the sun on the lower half of the sidewall from top to bottom. The roof never sees the sun, and the other three side are subjected to minimal sunshine during part of the day.
With all of that said; has anyone else experienced this issue with this particular type of trim on their Redwood, and if so, what was the cause of it shifting and/or bowing out and coming loose? How did you fix it, or have it fixed at the repair facility? Does anyone on this forum know how Redwood attaches this trim to both the fiberglass and aluminum it is covering? I know that I've not had leaks that would have caused the melamine board in the sub-wall covering to rot, and when looking behind the trim that has bowed out away from the wall, I see no attachments connecting it to the wall. So does Redwood just glue it on? I've seen where in some of the less expensive manufacturer's RVs, they screw the trim to the RV every so often. Although a bit unsightly, maybe a clue!
__________________
2013 Redwood 36FB
2001 Volvo VNL420 HDT Custom RV Toter
450 Horsepower Cummins ISX
Eaton Fuller Super 10-speed Transmission
ET Senior Fifthwheel Hitch,articulating air ride pin box
Resident Lead Host @ Ross Prairie Trailhead & Campground

|

|

|
|
11-08-2018, 02:34 PM
|
#2
|
|
Senior Member
Join Date: Jul 2015
Posts: 2,288
|
Good Morning,
I had a few pieces shift that same way....
I took the touch up paint that they gave me and painted the exposed area..
You have to be looking for it now in order to see it.. and I have not had any additional shift since the original...
__________________
2020 F-350
2020 3991RD with-
17.5 Goodyear 114's , Titan Disc brakes, MorRyde 8K IS, Onan 6.5..
|
|
|
|
|
11-08-2018, 02:48 PM
|
#3
|
|
Senior Member
Join Date: Sep 2012
Posts: 3,353
|
My FB did the same, particularly the short pieces on the door side. Take something soft & push them down back into place & recaulk. I bought some black stainless screws & put a couple in each of those that kept moving, if you didn't know better you'd think it came from the factory that way.
__________________
Danny & Linda
Full-timed 10+ years
Former '13 FB owner
Traded '13 GMC Denali DRW D/A
Currently rv & truckless
Replacement undetermined
|
|
|
|
|
11-08-2018, 03:56 PM
|
#4
|
|
Senior Member
Join Date: Feb 2013
Posts: 7,101
|
Mine did it too on our 2014, continuously. I think the factory cut them too long, so when the sun expands them they have no place to go but sideways. Sucks on the full body paint models.
__________________
Brad & Dory - Lone Tree, CO
CURRENT - 2013 Itasca Meridian 42E/2013 Wrangler 4dr Sahara
SOLD - 2014 Redwood 36RL/2014 F350 DRW
|
|
|
|
|
11-09-2018, 02:24 AM
|
#5
|
|
Member
Join Date: May 2018
Posts: 50
|
Quote:
Originally Posted by travelin' texans

My FB did the same, particularly the short pieces on the door side. Take something soft & push them down back into place & recaulk. I bought some black stainless screws & put a couple in each of those that kept moving, if you didn't know better you'd think it came from the factory that way.
|
Great idea Danny. What size and length screws did you end up using? I assume that they will be screwing into melamine beneath the fiberglass siding and aluminum skirting where they butt up to each other on the horizontal seam? I've always wondered what the purpose is for the RV builders always placing that seam several inches above the floor. If it leaks, (and you don't catch it in time) it always ends up rotting both the outer sub-wall and interior paneling, along with the floor of the RV.
__________________
2013 Redwood 36FB
2001 Volvo VNL420 HDT Custom RV Toter
450 Horsepower Cummins ISX
Eaton Fuller Super 10-speed Transmission
ET Senior Fifthwheel Hitch,articulating air ride pin box
Resident Lead Host @ Ross Prairie Trailhead & Campground
|
|
|
|
|
11-09-2018, 04:26 AM
|
#6
|
|
Senior Member
Join Date: Sep 2012
Posts: 3,353
|
If I recall they were 1"+/- #6 or 8 black stainless, they screw into wood, the walls are 3/8"+/- plywood under the fiberglass. I screwed them in, removed them, filled the holes with silicone, reinstalled the screws & caulked the seams.
__________________
Danny & Linda
Full-timed 10+ years
Former '13 FB owner
Traded '13 GMC Denali DRW D/A
Currently rv & truckless
Replacement undetermined
|
|
|
|
|
11-09-2018, 08:59 PM
|
#7
|
|
Member
Join Date: May 2018
Posts: 50
|
Quote:
Originally Posted by travelin' texans
If I recall they were 1"+/- #6 or 8 black stainless, they screw into wood, the walls are 3/8"+/- plywood under the fiberglass. I screwed them in, removed them, filled the holes with silicone, reinstalled the screws & caulked the seams.
|
Thanks Danny. If I remember correctly, the exterior sub-wall material under the fiberglass is 2-layers of melamine plywood with the seams staggered. The interior layer is glued to the aluminum wall frame and foam insulation, outer layer glued to the inner, thin fiberglass sheet then glued to the outer layer of melamine, all then run through the roller press and vacuum bonded. That will give a fairly descent amount of structure for the screws to be screwed into and hold, as long as they are not over tightened. I always back the new screws out and fill with silicone like you did to help prevent leakage and rotting around the screws. For a consistent look, I think i will go ahead and do all of the trim pieces along this seam on both sides of the unit, thus making it look like it was built at the factory that way. Plus it will help prevent the other trim pieces from even thinking of shifting or bowing.
Its just ashamed that such beautifully built higher end 5ers such as these even have such an issue, and that the owner ends up having to place a bunch of screws in them to keep the trim from falling off.  Otherwise, we love our 2013 Redwood 36FB!
__________________
2013 Redwood 36FB
2001 Volvo VNL420 HDT Custom RV Toter
450 Horsepower Cummins ISX
Eaton Fuller Super 10-speed Transmission
ET Senior Fifthwheel Hitch,articulating air ride pin box
Resident Lead Host @ Ross Prairie Trailhead & Campground
|
|
|
|
|
11-10-2018, 02:23 AM
|
#8
|
|
Senior Member
Join Date: Sep 2012
Posts: 3,353
|
Glad I could help!!
If you know someone that would like one identical in floorplan & colors as yours send them my way.
https://phoenix.craigslist.org/cph/r...?lang=en&cc=us
__________________
Danny & Linda
Full-timed 10+ years
Former '13 FB owner
Traded '13 GMC Denali DRW D/A
Currently rv & truckless
Replacement undetermined
|
|
|
|
|
11-12-2018, 12:56 PM
|
#9
|
|
Junior Member
Join Date: Aug 2014
Posts: 12
|
Quote:
Originally Posted by Gary Hage
Some of the decorative trim pieces that cover the horizontal seams between where the fiberglass (or whatever that material is called) on the sidewalls and the aluminum skirting abut one another is shifting, or bowing and coming loose on our 2013 36FB. As you can see in the attached photos, it began about a year or so ago with two short pieces of the trim directly across from one another on both the door-side and off door-side of the RV. Contacted Crossroads/Redwood's warranty office at the plant, and based upon my photos, they called it, "Trim shift". My concerns that could it possibly be being caused by a structural issue in the 5er were pretty much laid to rest by my contact. Rather, it was indicated to be nothing more than simply a cosmetic issue. Then about six months later, the long piece of trim on the living room/dining slide-out began lifting away from the wall, thus creating gaps in the sealer used to keep water from running in behind the trim and into the seam. I quickly resealed it with a tube of clear Parr sealer (we have full body paint). Now just this week, the piece of trim that runs from the rear of the RV to the slide -out on our door-side is beginning to bow away from the wall in the center, thus leaving an open gap in the sealer.
Allow me to note that our Redwood 36FB has traveled less than four thousand miles in its entire life, been pulled by an HDT with an ET hitch, along with the TrailAire pin box, and it has spent 80% of its life under an RV carport cover where it currently is sitting. Since we are more your stationary RVers, having only moved it between the three campgrounds where we resided at, (and currently reside) one the auto level has completed leveling up the 5er after having moved it, I've always placed four screw jack-stands equally spaced under the frame from front to back on both I-beams to make the RV more stable. I only bring them up to snug so as not to put a twist or bow in the frame. I will share this, in the orientation that our host site is, (we manage a state owned campground) our door-side of the RV takes most of the sun on the lower half of the sidewall from top to bottom. The roof never sees the sun, and the other three side are subjected to minimal sunshine during part of the day.
With all of that said; has anyone else experienced this issue with this particular type of trim on their Redwood, and if so, what was the cause of it shifting and/or bowing out and coming loose? How did you fix it, or have it fixed at the repair facility? Does anyone on this forum know how Redwood attaches this trim to both the fiberglass and aluminum it is covering? I know that I've not had leaks that would have caused the melamine board in the sub-wall covering to rot, and when looking behind the trim that has bowed out away from the wall, I see no attachments connecting it to the wall. So does Redwood just glue it on? I've seen where in some of the less expensive manufacturer's RVs, they screw the trim to the RV every so often. Although a bit unsightly, maybe a clue!
|
Just noticed the same issue on short piece between storage doors, 2013 36FL, this RV had not moved mire that 1k miles. Do you happen to have the paint codes, purchased it used and did not have the touchup paints as I have seen mentioned in other threads.
|
|
|
|
|
11-12-2018, 03:02 PM
|
#10
|
|
Senior Member
Join Date: Sep 2012
Posts: 3,353
|
Quote:
Originally Posted by charliel
Just noticed the same issue on short piece between storage doors, 2013 36FL, this RV had not moved mire that 1k miles. Do you happen to have the paint codes, purchased it used and did not have the touchup paints as I have seen mentioned in other threads.
|
If you push the trim back into place you may not need the paint.
List the color of your FL & I'm sure someone will have the codes & most any auto parts store or body shop could mix some up.
__________________
Danny & Linda
Full-timed 10+ years
Former '13 FB owner
Traded '13 GMC Denali DRW D/A
Currently rv & truckless
Replacement undetermined
|
|
|
|
|
11-14-2018, 03:14 AM
|
#11
|
|
Member
Join Date: May 2018
Posts: 50
|
Quote:
Originally Posted by charliel
Just noticed the same issue on short piece between storage doors, 2013 36FL, this RV had not moved mire that 1k miles. Do you happen to have the paint codes, purchased it used and did not have the touchup paints as I have seen mentioned in other threads.
|
Here they are:
__________________
2013 Redwood 36FB
2001 Volvo VNL420 HDT Custom RV Toter
450 Horsepower Cummins ISX
Eaton Fuller Super 10-speed Transmission
ET Senior Fifthwheel Hitch,articulating air ride pin box
Resident Lead Host @ Ross Prairie Trailhead & Campground
|
|
|
|
|
 Posting Rules
|
You may not post new threads
You may not post replies
You may not post attachments
You may not edit your posts
HTML code is Off
|
|
|
|
 » Recent Threads
 |
|
|
|
|
|
|
|
|
|
|
|
|
|
|
|
|
|
|
|
|
|


 Linear Mode